Monday, March 21, 2011

MED-V Step by Step Setup Guide | Part 3: MED-V Client and Management Console
This is the last part of MED-V Step by Step Setup Guide which will cover the MED-V Client and Management Console installation. I will perform this installation in a Windows 7 operating system with 1.5 GB of memory. You need to have a machine with minimum of 1.5 GB memory in order to perform this installation. FYI, MED-V Client and Management Console only support Windows XP, Windows Vista, and Windows 7 with minimum of 1.5 GB memory.
First of all, we’ll need to install Virtual PC 2007 SP1 located inside the MED-V folder and the required updates within the same folder.
After you’ve installed Virtual PC 2007 and all the required updates, execute the MED-V Client installer to kick start the setup. After you executed the installer, a prerequisites will check if you passed all the requirements.
 Click Next on the Welcome page
 Accept the terms in the license agreement and click Next
 Click Next on the Destination Folder page. Of course you can change the location by clicking Change.
 On the MED-V Settings page, tick Install the MED-V Management application and also rename the Server address to you MED-V Server name. For instance, MEDVSVR is my MED-V Server name.
*If you wanted to install the MED-V Client for user only, DON’T tick Install the MED-V management application.
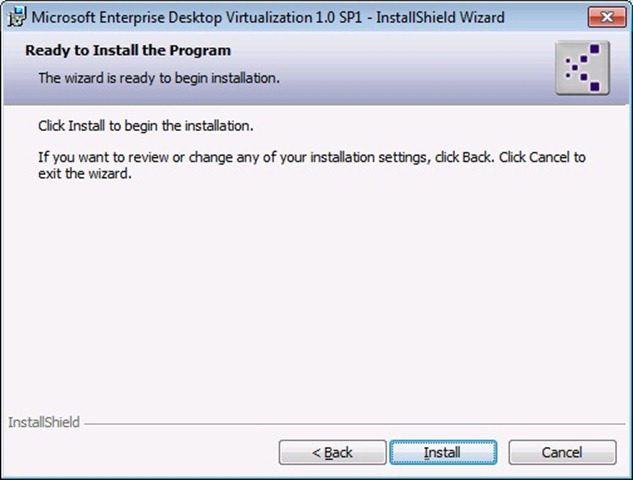 Click Install to start the installation.
 After the installation completed, un-tick Launch Microsoft Enterprise Desktop Virtualization and then click Finish.
Next, launch MED-V Management under All Programs\MED-V to start the MED-V Management Console.
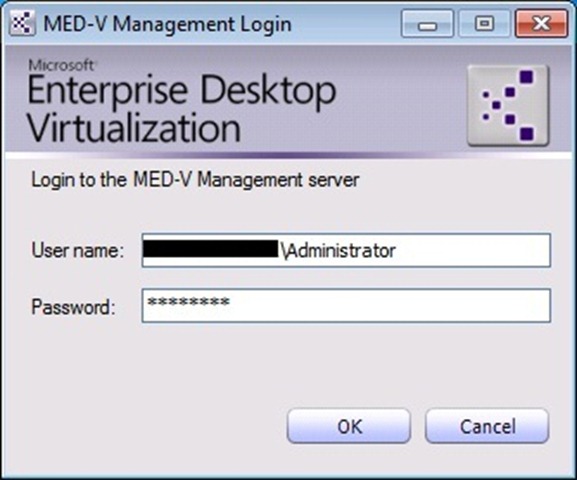 Enter the User name and Password.
 Now you can manage all the virtualized desktop with this newly installed MED-V Management Console.
Cheers~!!! You have just completed the setup. Sadly that I won’t cover the administration and operation in this MED-V Step by Step Setup Guide, maybe in near future. See you~!!!
First of all, we’ll need to install Virtual PC 2007 SP1 located inside the MED-V folder and the required updates within the same folder.
After you’ve installed Virtual PC 2007 and all the required updates, execute the MED-V Client installer to kick start the setup. After you executed the installer, a prerequisites will check if you passed all the requirements.
 Click Next on the Welcome page
 Accept the terms in the license agreement and click Next
 Click Next on the Destination Folder page. Of course you can change the location by clicking Change.
 On the MED-V Settings page, tick Install the MED-V Management application and also rename the Server address to you MED-V Server name. For instance, MEDVSVR is my MED-V Server name.
*If you wanted to install the MED-V Client for user only, DON’T tick Install the MED-V management application.
 Click Install to start the installation.
 After the installation completed, un-tick Launch Microsoft Enterprise Desktop Virtualization and then click Finish.
Next, launch MED-V Management under All Programs\MED-V to start the MED-V Management Console.
 Enter the User name and Password.
 Now you can manage all the virtualized desktop with this newly installed MED-V Management Console.
Cheers~!!! You have just completed the setup. Sadly that I won’t cover the administration and operation in this MED-V Step by Step Setup Guide, maybe in near future. See you~!!!
MED-V Step by Step Setup Guide | Part 2: Med-V Server Installation & Configuration
Continuing from Part 1, Part 2 will be focus on the server installation and configuration. Most of the configuration will be done on the Web Server (IIS). Before we start, please make sure that you done all the prerequisites shown in Part 1.
We’ll start with the Med-V server installation, double click the Med-V Server.msi.
We’ll start with the Med-V server installation, double click the Med-V Server.msi.


That’s all, the MED-V Server has been successfully installed. Now, we’ll proceed to the configuration.


We’ve done all the configurations needed in the Web Server (IIS), we shall proceed to MED-V Server Configuration Manager to complete the configuration. Launch the MED-V Server Configuration Manager under All Programs\MED-V.


As for the VMs URL, enter http://SERVERNAME/ALIAS. For instance, http://medvsvr/medvimages.


Good Job!!! You’ve successfully installed and configured the MED-V Server. The MED-V Server is now ready to host the MED-V images. =)
Subscribe to:
Posts (Atom)