Saturday, January 1, 2011

Windows Server 2008 R2 Migration Tools

The Windows Server 2008 R2 Migration Tools are a set of tools available to simplify migration of various roles, features and other server data to a new server running Windows Server 2008 R2.
As described on the Migration Tools TechNet documentation, the following can be migrated using these tools:
Roles
Active Directory Domain Services and DNS
DHCP Server
File Services
Print Services

Features
BranchCache

Settings and Data
Data and Shares
IP Configuration
Local Users and Groups

Installation
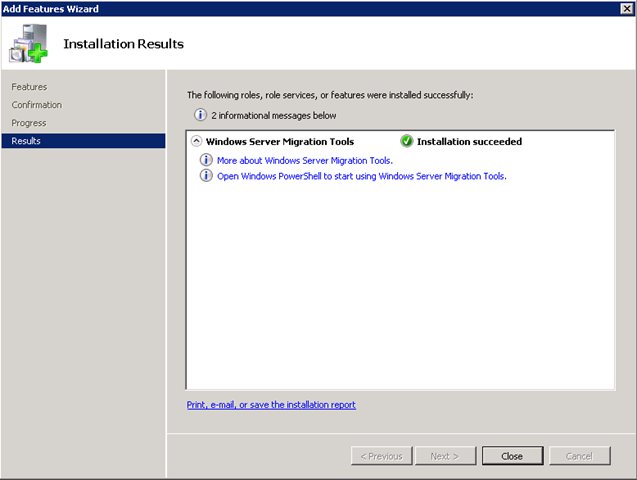
Start by installing the Windows Server Migration Tools feature from the Add feature wizard in Server Manager on the destination server running Windows Server 2008 R2:
image
image
image
You can find the new feature on the Start-menu in Administrative tools:
image
After the “Windows Server Migration Tools” PowerShell prompt are opened, go to C:\Windows\System32\ServerMigrationTools.
Type SmigDeploy.exe /? to list the description and usage of this command.
image

Example usage
In this example we`ll migrate a DHCP Server running on a Windows Server 2003 machine. To create a deployment package for Windows Server 2003 32-bit, execute the following command:
image
When the package folder are successfully create, copy the folder to the source DHCP Server:
image
The only requirement on the source Windows Server 2003 server are Windows PowerShell (and thereby .NET Framework 2.0).
Start SmigDeploy.exe from the SMT_ws03_x86 folder to fire up Windows PowerShell with the Windows Server Migration Tools snapin.
Available cmdlets for this snapin:
image
Execute the cmdlet Get-SmigServerFeature to get the set of all Windows features that can be migrated from the local server:
image 
image
The cmdlet returns the DHCP Server as a feature available for migration:
image
Here we got the DHCP Leases on the source DHCP Server, which are to be migrated to the Windows Server 2008 R2 server:
image
To export the DHCP Server configuration and database, run the Export-SmigServerSetting cmdlet with the following parameters (you will be prompted for a password to protect the exported file):
image
The export was successful, and we can see the exported *.mig-file:
image
Copy the *.mig file to the target DHCP Server.
To import the DHCP Server configuration and database, run the Import-SmigServerSetting cmdlet with the following parameters (you will be prompted for the password  for the exported file):
image
The DHCP Server feature was not installed on the Windows Server 2008 R2 server, but the Import-SmigServerSetting takes care of this automatically:
image
The import was successful:
image
After starting the DHCP Server service we can open the DHCP Server management console and verify that the migration was successful:
image
This concludes this post regarding the new Migration Tools, and I must say I really like this new feature, especially the fact that it`s leveraging Windows PowerShell. I would recommend you to play around with this in a lab environment to get to know it`s usage.
Edit 25.08.2009: As stated in the documentation on Technet, the DHCP-service on the source server must be stopped (Stop-Service DHCPserver) prior to the export. Thanks to Max for pointing this out

Monday, December 27, 2010

Migrate Active Directory from 2003 R2 to 2008 R2 Server Core

This blog will step you through the process of migrating your Active Directory domain controllers from Microsoft Windows Server 2003 R2 to Windows Server 2008 R2 Server Core. Server Core is an excellent choice for dedicated domain controllers since it requires less maintenance, has a reduced attack surface, requires less management, and will run on less hardware. Lots of people are scared off by Server Core because there’s no GUI. 
 To be honest with you, it’s a blessing in disguise since you shouldn’t be managing your production Active Directory environment directly on your domain controllers anyway. You can remotely manage AD, DNS, DHCP, etc from your Windows 7 pc with a GUI interface by using the “Remote Server Administration Tools for Windows 7“. I’m sure the tools probably exist for Windows Vista also. See my blog on “How to create an Administrative shortcut” which will make your life a lot easier since the best practice is to log into your pc as a normal user (not as a user with elevated domain privileges).

Prerequisites:
(1) All of your existing active directory domain controllers need to be running Windows 2000 Service Pack 4 or higher.
(2) Your forest must be in at least Windows 2000 native mode.
(3) Verify your Antivirus and Backup agents will run on Windows Server 2008 R2 Server Core.

Copy the contents of the \support\adprep folder from the Windows Server 2008 R2 DVD to a location that is accessible by the schema master for your forest and the Infrastructure Master for each of your domains that you plan to update. The Schema Master is a forest level FSMO role (one per forest). How to identify the schema master article on TechNet. The Infrastructure Master is a domain level FSMO role (one per domain). How to identify the Infrastructure Master article on TechNet.
Log into the schema master as a user who is a member of the Enterprise Admins group and Schema Admins group. Open a command prompt and navigate to the folder where you copied the adprep utility. Run adprep32 /forestprep if the schema master is using a 32 bit version of Windows Server 2003 R2. Run adprep /forestprep if it is a 64 bit version. When the forestprep completes, you will receive the following message:
If all of your domain controllers are running Windows Server 2003 and your forest level is at the Windows 2003 level, then I recommend going ahead and preparing the forest for Read Only Domain Controllers by running adprep32 /rodcprep . When rodcprep completes you will receive the following:
Allow for the changes from the forestprep and rodcprep commands to propagate out to all of the domain controllers in your forest. You can use RepAdmin.exe to verify that the replication is complete. Run:
repadmin /replsum /bysrc /bydest /sort:delta and then repadmin /showrepl
Once the replication of the forest schema updates have completed to all domain controllers in your forest, login to the infrastructure master of each domain in the forest that will be updated to the Windows 2008 R2 level as a member of the domain admins group. Open a command prompt and navigate to the folder where you copied the adprep utility. Run:
adprep32 /domainprep /gpprep
If your domain is not at least in Windows 2000 native mode, you will receive the following error message:
Your forest and domains have now been updated so that you can introduce Windows Server 2008 R2 domain controllers. Since this blog focuses on migrating your active directory environment from Windows Server 2003 R2 to Windows Server 2008 R2 Core, you need to start with a fresh installation of Windows Server 2008 R2 on a new server. One thing to remember is that the R2 version of Windows Server 2008 is 64 bit only so you’ll need hardware capable of running a 64 bit operating system. Any server purchased in the last three years should be fine for the core edition since it has reduced hardware requirements, and in this example, I’m virtualizing the new domain controller using Hyper-V Server 2008 R2.
During the installation of the operating system, select one of the Server Core versions:
Once the installation of the operating system is complete, you are asked to change the password since the initial one is blank. Once this is complete and you log into the server, you notice the huge difference between the normal installation and core which only has a command prompt:
Run sconfig.cmd (which is only available on R2) from this command prompt to start the Server Configuration:
Set the computer name, configure the network settings, install windows updates, and add it to the domain. This process is much easier in the R2 version with sconfig instead of having to manually do everything from the command prompt.
To make this server a domain controller, Run:
dcpromo /unattend /InstallDNS:Yes /ReplicaOrNewDomain:Replica /ReplicaDomainDNSName:mikefrobbins.com /ConfirmGc:Yes  /UserName:mikefrobbins\administrator /Password:* /SafeModeAdminPassword:password /RebootOnCompletion:No
There are many more options for dcpromo /unattend. A list of these options can be found on TechNet. The following command will remove active directory services and revert the server back to a member server if needed.
dcpromo /unattend /AdministratorPassword:password
If you revert the domain controller back to a member server as referenced above, you’ll probably also want to remove the DNS Server role. To remove the DNSServer role, run:
Start /w ocsetup DNS-Server-Core-Role /uninstall
The oclist command will show you a list of roles that are currently installed.
Warning: You cannot manage a Windows Server 2008 R2 DNS Server from Windows Server 2003 R2. You will receive this error even though the DNS Server is operating properly:
To install the DHCP Server role on your core domain controller, execute the following command:
Start /w ocsetup DHCPServerCore
If you don’t use the start /w part of the command, it will still work, but it immediately returns you to a command prompt and you won’t know when the installation of the role has completed.
Set the DHCPServer service to start automatically:  sc config dhcpserver start= auto
Start the DHCPServer Service:  net start dhcpserver
Authorize the DHCPServer:  netsh dhcp add server dc102.mikefrobbins.com 10.0.0.2
Configure the remainder of the dhcp server options from another machine that has the GUI tools installed. Managing DHCP from a Windows Server 2003 R2 machine seems to work fine. Transfer the FSMO roles from your Windows Server 2003 R2 domain controllers before decommisioning them.
Enter the software license key:  slmgr /ipk xxxxx-xxxxx-xxxxx-xxxxx-xxxxx
Activate the operating system:  cscript C:\windows\system32\slmgr.vbs -ato

Wednesday, December 22, 2010

Securing Wireless Networks with Windows Server 2008 and NPS

In this post I’m going to go through the process of securing your wireless network using Windows Server 2008 and the NPS (Network Policy Services) role from start to finish.

Previously, I was using Windows Server 2003 with IAS (Internet Authentication Services) to secure my wireless network, until I recently upgraded all of my servers to Windows Server 2008 – By the way, NPS is the new version and name for IAS.

Here is the TechNet guide which I followed – http://technet.microsoft.com/en-us/library/cc771455.aspx - I will be applying these guidelines to the following environment…

» A Windows Server 2008 machine running AD DS (Active Directory Domain Services)
» A Windows Server 2008 machine running NPS (Network Protection Services) and AD CS (Active Directory Certificate Services)
» A Linksys WAP54G (an entry level wireless access point – you can use any wireless access point that supports RADIUS)

You can run NPS, AD DS and AD CS on the same machine if you want to, but I wouldn’t recommend it (personally, I prefer to keep my domain controllers running only AD DS).

I’m not going to go through the process of installing AD DS as it’s a little out of scope for this post, so we’ll start from having an established domain, and a clean install of Windows Server 2008 on which we will install AD CS and NPS.

The first step is installing AD CS and NPS on your clean Windows Server 2008 install…

1.First, you’ll need to join the server to your existing domain and then restart;
2.After the server restarts, open Server Manager;
3.Click on the Roles node;
4.Click on the Add Roles;
5.On the Server Roles screen, select Active Directory Certificate Services and Network Policy and Access Services;
6.Follow the wizard, selecting Network Policy Server when configuring the Network Policy and Access Services role and leaving the default Certification Authority role service selected for AD CS;
7.Select Enterprise for the setup type for AD CS;
8.Choose Root CA for the CA Type (remember we’re assuming that this is the first Certification Authority in your environment, so if it’s not you either don’t need to install this role, or if you choose you can configure this server as a Subordinate CA instead);
9.Run through the rest of the wizard, making any changes you may wish to, otherwise just leave the defaults as they are appropriate (I changed the CA Common Name to the name of the server, as I think it’s cleaner) – Note that there is a warning at the end of the wizard, stating that the name of this server cannot be changed after installing the AD CS role.

Now that you have a Root CA and an NPS server on your domain, we can start configuring it…

1.Open an MMC console, and go to File -> Add/Remove Snap-in…
2.Add the Certificates snap-in, selecting Computer account for the local computer;
3.Expand Certificates (Local Computers) -> Personal, right click on Certificates and choose Request new certificate;
4.Follow the wizard, choosing Computer for the certificate type and then click the Enroll button, then close MMC;
5.Open the Network Policy Server administrative console from Administrative Tools;
6.Right click on the parent node, NPS (Local) and click Register server in Active Directory – Click OK on the two informational popups;
7.With the NPS (Local) node still selected, choose RADIUS server for 802.1X Wireless or Wired Connections and then click on the Configure 802.1X button;
8.Under Type of 802.1X connections, select Secure Wireless Connections and provide an appropriate name for the policies which will be created as part of this wizard;
9.In the next step, you’ll need to configure a RADIUS client (by the way, RADIUS stands for Remote Authentication Dial In User Service), so click on the Add button;
10.The RADIUS client will be your wireless access point, so for the friendly name type in something to identify the access point (for example, AP01), then provide the IP address or DNS entry for the access point;
11.Click on the Generate radio button, and then click on the Generate button to generate a shared secret – Copy the shared secret to a notepad document, and click OK – Note that on my particular access point, a character limit of 22 characters exists for shared secrets so I had to cut the string down to the acceptable limit, so I would suggest checking for this limitation on your own hardware;
12.Click Next, and then choose Microsoft: Protected EAP (PEAP) and then click on the Configure button (if you get an error message, you probably didn’t follow steps 1 -> 4 correctly);
13.Ensure that the Certificate issued drop down box has the certificate you enrolled in step 4;
14.Click Next, and then click on the Add button to use an Active Directory group to secure your wireless (you should add both the machine accounts and user accounts to this group to allow the machine to authenticate on the wireless before the user logs in);
15.On the next step of the wizard, you can configure VLAN information, otherwise just accept defaults to complete;
16.Restart the Network Policy Server service.

If you expand the Policies node now, you’ll see that the wizard has created a Connection Request Policy and a Network Policy containing the appropriate settings to authenticate your wireless connection – These individual policies can obviously be created manually, but the wizard is an easier method.

You can also remove the less secure authentication method options, and increase the encryption methods in the network policy if you wish (I have configured mine this way)…

1.Under the Network Policies node, bring up the properties of the newly created policy;
2.On the Constraints tab, uncheck all of the checkboxes under Less secure authentication methods;
3.On the Settings tab, click on Encryption and uncheck all boxes except Strongest encryption (MPPE 128-bit);
4.Save the policy and then restart the Network Policy Server service.

With the NPS server configured to accept requests from your wireless access point, you’ll now need to configure the access point to communicate with the NPS servers – These instructions are for my Linksys WAP54G, but will be similar to most access points which support RADIUS…

1.In the web interface for the access point, click on the Wireless tab and assign an appropriate SSID;
2.Click on the Security sub-tab, and set the Security Mode to WPA-Enterprise (if your access point supports WPA2-Enterprise, use this instead);
3.Set the Encryption to AES, and then provide the NPS server IP as the RADIUS Server and the Shared Secret that you saved in step 11 above;
4.Save your settings and restart the access point.

Now your access point should be configured to talk to your NPS server, so all that is left is to configure your clients to connect – The recommended way of doing this, would be to use Group Policy, but the instructions below are for configuring a Windows Vista client – You can easily replicate these actions in a Group Policy under the Security node.

To configure a Windows Vista client which is joined to the domain…

1.Open up the Network and Sharing Center;
2.Click on Connect to a network;
3.Locate the network you have just secured (it should say Security-enabled network next to it) and click the Connect button;
4.It will take a short while to set up the profile and then connect successfully.

You can also configure a few extra settings to speed up the time it takes to connect (it won’t improve the overall speed, only the time it takes to initially connect to the wireless network)…

1.In the Network and Sharing Center, click on Manage wireless networks and then double click the network you set up above;
2.Click the Security tab, and then the Settings button below;
3.The Validate server certificate checkbox should already be selected by default, but you should also select the CA that you set up earlier under the Trusted Root Certification Authorities to speed up the certificate verification process;
4.You can also check the box Do not prompt user to authorize new servers or trusted certification authorities in order to improve the user’s experience.

Some suggestions recommendations…

» Use a security group with the appropriate machine and user accounts as members to secure your network;
» Group Policy is by far the best way to deploy the client side settings, but will obviously require an established domain connection in order to push these settings down to the clients;
» While disabling the SSID of your access point sounds like an increased security measure, it can be a security risk if you are configuring your workstations to actively look for the SSID name – Potential session hijackers could intercept this traffic and set up an SSID for the requested name, unknowingly to the user which would then connect to a potentially malicious network;
» You can vary the encryption type from AES to TKIP if your devices don’t all support AES, although AES is the preferred encryption algorithm;
» If you’re having trouble with your connection, there are a few places you can look to troubleshoot, namely – Local client event logs, the NPS log file which lives in C:WindowsSystem32logfiles and most importantly the Security event logs of the NPS server which contains detailed information about access successes and failures.